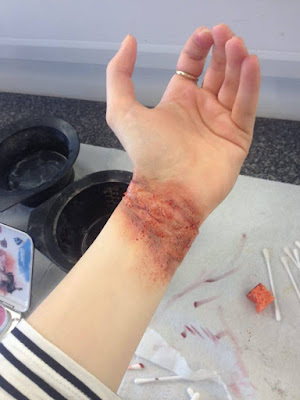
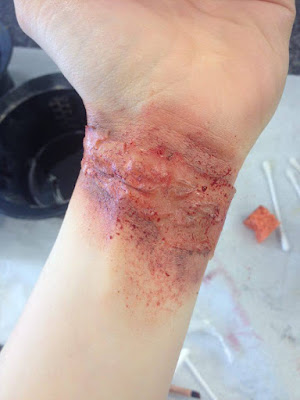
Creating Light scares using moulds...
In this blog I will be writing about the process of applying gelatin moulds to the skin. As we have been learning about 'continuity' during this unit this process can be very important to make-up artist. For example when an artist will want to repeat a look such as cuts if the gelatin moulds are made they can be re-used making them exactly the same in shape and form with only the skill of colouring left down to the artist.
Kits:
- Gelatin Mould- Supercolour Pallet
- Fake blood
- Procaine
- Which Hazel
- Foundation
- Beauty Blender
- Powder
- Fluffy brush
- Cotton buds
- Stipple sponge

Process:
To start off this process we were given pre-made scar moulds. The moulds are made by pouring hot, melted gelatin into a pre-made mould and when it is cool the gelatin would have set and would be ready for use. A tip when making the moulds are too place talcan powder in the mould first so it is easier to peel out the mould.To start using the mould I wanted to place mine on my wrist therefore by using a special protechics glue called 'Procaine', take a cotton bud and place this over the area where you would like to stick your scar and the apply some to the back of the scar. You have to wait till both your wrist and the mould have gone clear from the glue and then you can stick them together, otherwise the glue may show through which will not look realistic.
 When you have stuck your mould to your hand I then took a cotton bud and which hazel and rubbed this over the edges of my mould to thin out the mould. I needed to thin out the mould so when applying make-up to it, it would look more blended into my real skin. I did find this process very long winded but it is very nesseaurary to do so.
 When I thought my mould was blended enough I powdered over the whole mould to take away any shine. I then took a beauty blender and applied a foundation over the mould and blended it out into my real skin.
To finish off the whole look I used the colours; yellow, dark and light red and a little blue to create the colourings within my scar. I used a stipple sponge to stipple on an even amount of fake blood to then finish off the look.
 Reflect:
- When using the which hazel I would have taken more time in blending out the edges as I believe this would have improved on the realism of my scar. - I need to practice and study more into the colourings of scars as I believe I need to make it more realistic which I will achieve through practice.
No comments:
Post a Comment