Showing posts with label Practice. Show all posts

Saturday, 16 April 2016

Photoshoot

Final Photos, Location and Video

In this blog I will be talking about my final photoshoot and the final images that I produced for this project. I will be explaining the process of the day, why I chose the location and props and how I felt the day went.

During this shoot I wanted to consider my story line about my chosen TV series 'Grimm' and how I wanted to represent elements of the original Grimm's Brothers Tales of Rapunzel also. To recap my Story line that relates to all these elements I will explain below:

'Nick the main character of the Grimm's TV series has the power ability to see mystical creates that are hidden in there human form. Nick is the Last of the Grimm's with this power therefore using his power and his job of being a detective he must solve crimes that are based around the original stories of the 'Grimm's Brother Tales'. Claudia and Mrs. Laderman represent the Grimm's Brothers Tale of Rapunzel for this story and TV series. Claudia represents Rapunzel as she lives in a top floor apartment near the woods and she has never been outside due to the fear of the unknown, influence of horror films and that her neighbour Mrs. Laderman. Claudia is a young women of a pale completion (as she has never been outside), she has long locks of hair, is naturally beautiful and crave to brave to go outside as she loves nature. However, as Mrs. Laderman lives in the apartment floor below (representing Rapunzel's Evil step mother) she explains to Claudia that the outside world is evil in order to keep Claudia in her sight. Mrs. Laderman is a horrid looking old women with grey hair and a wrinkly face but used to be beautiful and her only wish is to regain her youth but even her powers of being a witch cannot change this. Therefore she keeps Claudia within her apartment as she reminds her of her lost youth but when Claudia tries to brave and leave her apartment Mrs. Laderman must stop this with horrid traps to scare her back inside. Claudia has to resort in calling the police (nick) as she is confused on why she is getting harmed everytime she leave her home meaning Nick is there to try and solve the case. However, Claudia manages to escape and Mrs. Laderman is not happy...'    

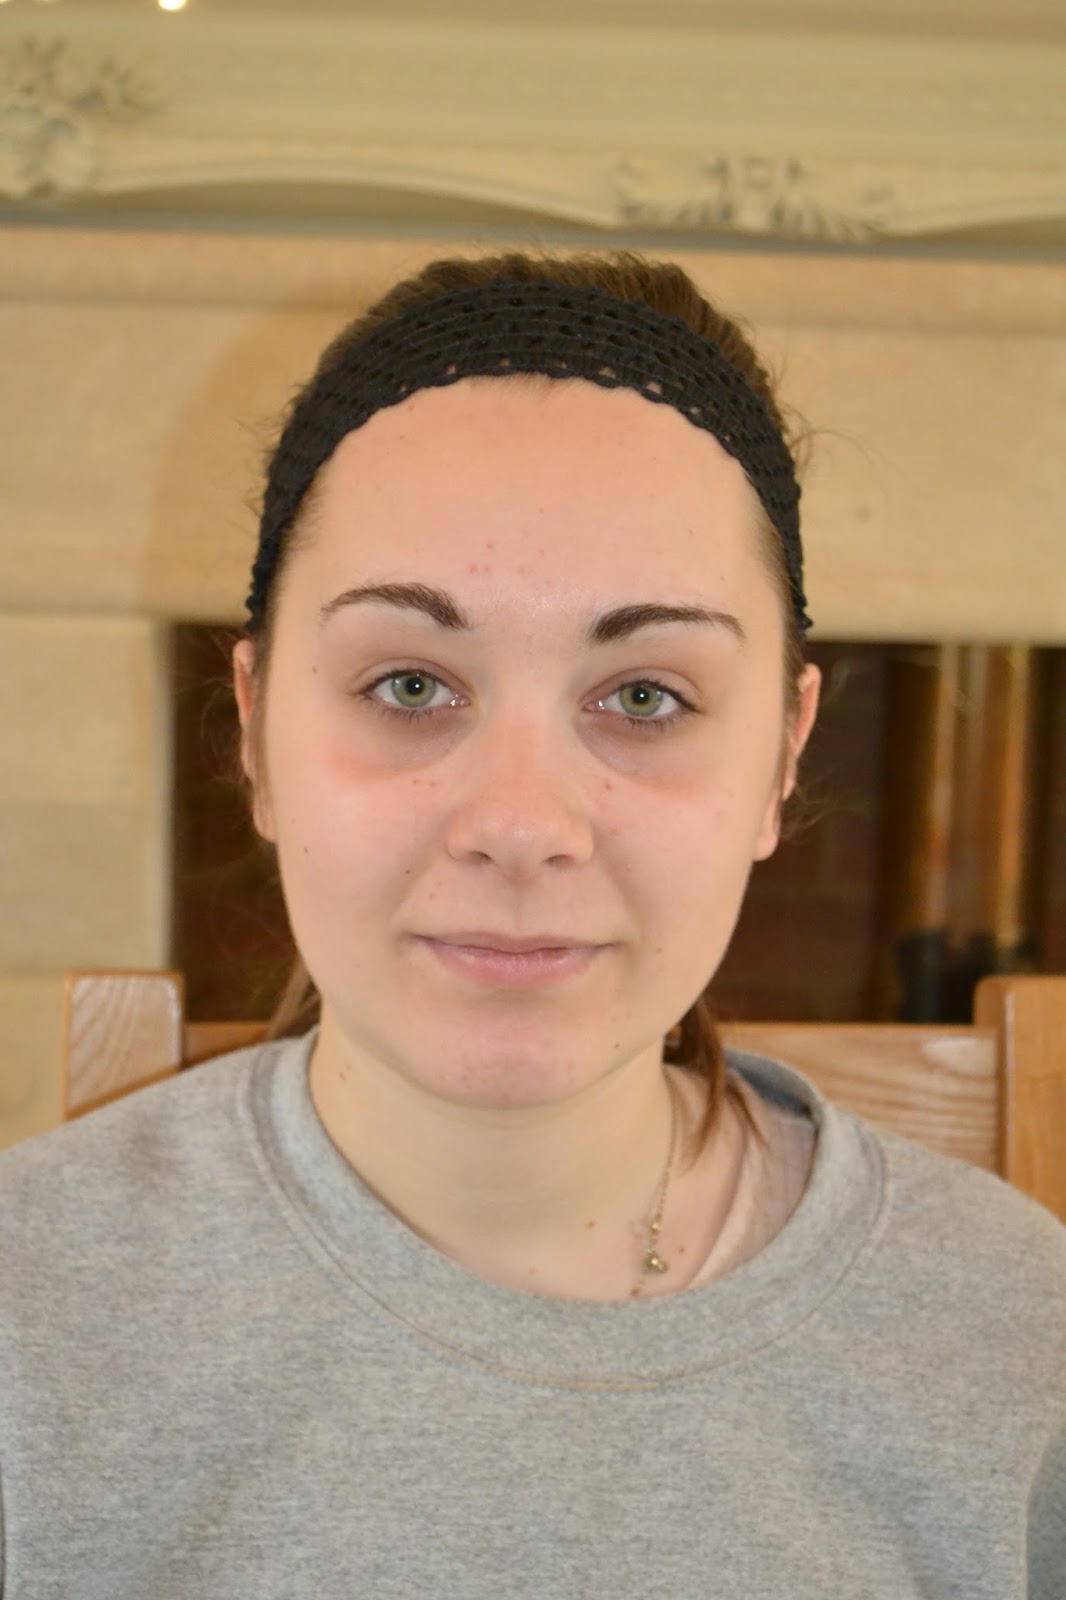
Final Claudia Photos (Headshots):


Final Mrs.Laderman Photos (Headshots):


Outdoor Photo Shots:


Final Photos:


Friday, 15 April 2016

Final Character: Claudia

Claudia... All Made up

In this blog I will be writing about my final chosen Make-up and Hair Designs for my chosen character Claudia. I will be explaining why I have chosen these designs and how I produced these designs on my model. Down in this blog below I have quoted why I have chosen the Hair and Make-up design which were explained in one of my previous blog.

Make-up Design:


 'In my final design I have chosen a more basic make-up look as I wanted to go more natural beauty as I feel this best symbolizes my character. I have taken a lot of inspiration from the third image in. I wanted to as mentioned in every design have the pale complexion but I wanted to use a light peach eye shadow on my design as I believe this is softer than the gold look and more of a neutral tone and I will match the lips with the same colour. To finish of the eye and give a bit more detail I would add again the silver glitter in the tear duck as it represents mystery and sensitivity. I have included the same marks of horror e.g. cut, split lip, bloody nose and black eye but I have emphasize these aspects with bolder colouring and blood.'


Kit List:

- Illamaqua Matt Primer
- Nar's Foundation
- Beauty Blender
- Avon Peach blusher
- Illamaqua Liquid Metal Pallet (silver)
- Clear Eyebrow Jel
- Eye Shadow Pallet
- Scab Blood
- Modelling special Effects wax
- Liquid Latex
- Urban Decay Primer
- Illamaqua White Foundation


Process:

When I started the process of make-up on my character 'Claudia' I wanted to show two side to my character. As my character was being trapped within her apartment I wanted to show her original self in her 'Natural/True' beauty which would represent the 'Rapunzel' representation of my character I am creating. However, on the other hand I am also creating a gore version of my character as she tries to escape from her flat but is faced by the horrors of 'Mrs. Laderman'.

Beauty: To start the beauty look for my character I used the 'Illamaqua Matt Primer' and applied this all over the face then taking the 'Illamaqua White Foundation' and a small amount of 'Nar's Foundation' I mixed these product together to create a pale completion for mt character as to represent her never leaving her apartment. After applying my base I used a light peach blusher from my 'Avon' pallet very lightly on the apples of the checks to give a natural look. Then applying a small amount of 'Urban Decay primer' to the eye lids and then taking a fluffy brush from the 'Real Techniques' collection I used a peach eye shadow from the 'Avon' pallet around the eye and I brought it under the eye also which bring out the blue colour of my models eye. As I wanted a natural look to my model I used a clear lip gloss with a little bit of silver in the center of the lip from the 'Illamaqua Liquid metal pallet' and a natural clear brow gel. To add a last element of natural beauty I used a small detailed brush and a brown eye-shadow and added in fake freckles along the tops of the checks and nose. Then finished off by dusting over some 'Illamaqua loose powder' to blend them in to the natural skin, I believe that the freckles makes my character appear more natural beautiful and adds an element of innocence.  

Gore: When starting the gore element of my character I produced this over the already exciting make-up of my 'beauty' version of my character. To start this look I took colours from an eye shadow pallet to create a black eye. I started with a base colour of yellows and greens in the corner of the eye and buffed these colours out with a fluffy brush therefore it looks bruised and slightly aged. I then took a light purple and mixes of light/dark reds which I blended out from the corner of the eyes and then using a stipple sponge and 'Ben Nye scab Blood' I stippled this over the black eye. I continued this same process over one cheek. Then taking the different shades of red again I buffed in a small amount around the bottom of the nose and part of the lip. Using the scab blood again I ran a small amount below one of my model nostrils to make it appear as a bloody nose. To finish off the look I used a small amount of liquid latex on the top and bottom lip where I placed the eye shadow. When the latex was dry I used some tweezers to lift the latex so it was slightly raised and then using some scab blood and some colours from the super colour pallet I coloured it to produce a split lip. 


Hair Designs:

'In this design I have taken more inspiration from the 'boho' theme as my character Claudia is scared of the outside world but at the same time she loves the idea of the outside but is worried to explore it due to horror films and her 'evil' neighbour Mrs.Laderman. In this design I would curl the hair with a curling wand, making the hair appear long and naturally beautiful which will relate to 'Rapunzel' as she had long beautiful hair. I wanted to incorporate random three braid plaits within the hair as to add to the 'boho' theme and they will also let me put the flowers in them. Then lastly, add a spray of silver glitter in the hair which will add to the beauty of my character and the colour showing the innocence. On the other hand, I do worry that this design could be too simple when showing technique however it may suit the characters background really well.' 

Kit List:
- Curlers
- 'Claires' Silver Glitter spray 
- Fake white flowers
- Pin tail comb
- Hair Tie
- Hair spray


Process: 
To start this process of creating this style of hair shown below I started by sectioning the hair. I split the hair into two section (horizontally) creating a top and bottom section. Starting with the bottom section I simply curled the hair using a curling wand and then hair sprayed it so it would last longer and then did this same process on the top section. Then next I simply did lots of three braid plaits randomly in the hair and then using the flowers I pushed them within the braid which held them in place. To finish off the look I sprayed the entire head with silver glitter spray.  


Tuesday, 12 April 2016

Final Character: Mrs.Laderman

Mrs.Laderman... All Made up

In this blog I will be writing about my final chosen make-up and hair designs for my character Mrs.Laderman. I will be explaining my reasons on why I chose these designs and the process of how I produced these deigns on my chosen model. Down below I have quoted the reasons from my previous blog on why I have chosen these two designs to represent my characters.  

'In my final design I wanted to take inspiration from the stereotypical 'Witch' but adapt it to modern society and my TV series. Firstly again I will be creating the greying hair by using dry shampoo as this instantly ages a persons hair and face. I would split the hair into two by backcombing the hair at the bottom of the head to make it appear old and dry as if it about it fall out. With the top section of hair I would curl the whole of the top but then back comb each pieces and pin into place creating lots of pin-curls around the back of the head. I wanted to create this look as if my character still tries to achieve her beauty by attempting hairstyles but her age has far caught up with her shown through the backcombed ends.'  


Hair Kits:

- Pin tail comb 
- bobby pins 
- Curlers 
- Heat protector spray
- Dry Shampoo


Process:

During this process to create this look I used the pin-tail comb to section of the top part of the hair which I will then curl. Taking the bottom section of the hair and using the pin-tail comb I back-combed the ends of the hair to create a messy and tired look. Referring back to the top section of the hair I curled each piece of hair, back combed then pinned in pin curls around the top of the head. To finish the whole look I sprayed all the hair with dry shampoo to create a greying and ageing look. 


 'In my final design I have taken inspiration from all my designs, however I have changed some aspects and techniques. Instead of the creating the wrinkle with light and shades like shown in the other design I have decided to create them with the 'old age stipple' technique. I would also use a prosthetic witch nose and attach this with latex and blend in with the natural skin using foundation and different colouring of 'supercolour'. I decided to add in the red eyes in this design as I believe the tired eyes really highlights my characters feeling of stress to have youth and the red colouring really will bring out the eyes in photos. In this design I really want to achieve the witch element to my look as this is what my character is truly and I believe this will best represent her.'  


Make-up List:

- Latex 
- Hair dryer 
- Illamaqua loose powder 
- foundation
- Supercolour Pallet
- Prosthetic witches nose
- Avon (peach blusher)
- Brown eyeshadows


Process:

To start this make-up look that I have designed for my character I used the ben nye liquid latex and a stipple sponge. Using these products I used the 'Old age stipple' technique by pulling parts of the skin and covering in latex using the stipple sponge and drying with a hair dryer until it goes clear. (Making sure I tested the latex first on my model). After I had completed this method of the old age stipple all over the models face I then took the Illamaqua loos powder and dusted this across the face which takes the shine of the latex. Then using a beauty blender and a M.A.C Foundation I blended this all over the skin to make the old aged skin look more realistic. To define the wrinkles more I used different shades of brown eye shadows and an angled brush and drew within the wrinkles. I then blended these out with my fingers which defined the wrinkles more making the overall aged look more defined. Then using the 'Supercolour' pallet I took the light red and then the dark red in a gradient under the eyes to create a tired eye look. Using a lip balm I then ran this under the eye which softens and blends out the colour making it look more realistic. Lastly, to finish of the main look and taking the prosthetic witch nose I place it around my models nose and stuck it on with the liquid latex. when it was dry I added more layer of latex blending it out into my models real skin. As the nose I had was slightly tinted green I had to then cover the nose and the outer parts of it in a red supercolour as this is a contrasting colour when you apply foundation. To finish of the look I applied and blended out the foundation on the nose and coloured in the wort with the same brown eye-shadows.       


Tuesday, 29 March 2016

Inspired Hairstyles #2

Clown Hair

In this blog I am writing about another inspired look. In the lesson we were given an example of a 'Clown' inspired hair look inspired by an image on 'Pinterest'. In this unit I am learning to take inspiration from other sources to produce my own characters and by being taught these techniques this will help me within my design for my chosen series 'Grimm' and my characters. Below I will be writing about the techniques and tolls I used to produce this inspired look. 


Kits:

- Two Hair ties
- Pin Tale comb 
- Curlers 
- Hair Pins


In this first step we were tolled to adapt the look and make it more interesting by adapting the parting on the 'katie doll' heads. Using my pin-tale comb and the end of the comb I pulled the hair back with the comb and create a zig-zag moment. Then when this movement is created pull apart the hair which will leave the zig-zag parting like shown in the picture. This may take a couple of times in practice if you have never done this before and make sure to brush the hair though before creating as to make it easier to create.


When the zig-zag parting has been created take two hair ties and create two simple ponytails on either side of the head by gathering the hair on either side and tie them up. Then using pre-heated curlers curl either ponytail.  


Then using the pin-tail comb backcomb each ponytail and by having each ponytail pre-curled this will help make the buns bigger as it gives them more volume. Separating each ponytail into four sections curl each over and then pin into place using a bobby pin. Using the pin tail comb push the hairs to make the bun appear as one. Then repeat this technique on the other side.


Reflection:

In this blog I found this technique quite simple as I have created something quite simular in the previous unit. However, the concept is very helpful making me think into what can inspire me for my research to create my characters 'Mrs. Laderman and Claudia' to fit into my series 'Grimm'. 


Wednesday, 23 March 2016

Inspired Hairstyles:

American Horror Story

In this blog I am writing about inspired hairstyles from Horror Tv series. In this blog I am writing about the chosen hairstyles from the popular TV series ' American Horror story'. It is a horror based series described as an anthology series. Each season is conceived as a mostly self-contained miniseries with interesting characters a setting. we were putting together a look from one of the characters in the series to help gather an understanding of horror series styles which may help me within building up my designs. 


In this look we were shown an example on how to re-create this characters hairstyled played by the actress and singer/song writer 'Lady Gaga'. The style is quite classy but also ages the person by its short length and position. 


Kits:

- Hot hair rollers
- rollers and clips
- bobby pins 
- hair spray


Process:

To start this look I pre-heated my hot roller and sectioned the front section of the hair into a low side parting. When the rollers where heated I took the smaller front section and a red roller and roll a small section and clipped it into place. When the shorter side has two rollers in makes sure both are clipped in and move on to the longer side of hair. Taking the pin tailed comb section the front section into three and roll the hot rollers so the hair rolls towards the ears like shown in the first picture. 


In the next step taking the hair at the back of the head continue the hot roll curl method down the back but using the 'Brick method' to follow. Starting from two rolls, then three, then two then one. When all the rollers are set into place, hairspray the whole head and wait until the curls are cool and then take them out. 


Taking the front section with the high parting I swoop the hair around the side of the head and then clipped into place at the back of the head with a bobby pin and continued this on the other side. As the hair at the back of the head gave me lots of thick curls I took each section of curl working from the top to the bottom of the head I created a swirl and pinned it into place. Do this all over the back of the head until all curls are pinned into place. 


Reflective:

Overall, I am very pleased how this look came out however to improve on my look I would have heated my rollers for longer as my curls did not come out as tight as they should have. I may use this look for my Mrs. Laderman character as I am representing her as an older women and as my model is younger than her age this may help represent her as an older women.  


Horror and Fashion:

Horror and fashion: 

In this blog I will be writing about the relations between the Horror genre and fashion. In this lesson we were shown some relations between these two subject which could help me develop ideas for my unit project but also understanding how fashion develops ideas. 


Kit list:

- Illamaqua white foundation
- Supercolour pallet
- Flat brush
- Illamaqua highlight pallet
- foundation brush
- angled brush

Process: 


In this look we were given a choice of Horror related makeup looks and I choose this look to copy as I loved the mix of colours around the eyes. To start this look I started with the base of the face I used a round foundation brush to apply and buff into the skin. I then started on the the eye area as it was the main aspect of the look. I took the light purple colour and using my finger I patted it in around the eye bringing it round the eye. I then took the pink and using the same technique I patted the colour around the outside of the purple. Using the highlight pallet from Illamaqua I took the pearl shimmer colour and place this in the  corner (tear ducked ) and I repeated this same look on the other eye. Taking an angled brush and the black super colour I draw thin eyebrows (like shown in the picture) over the original eyebrows. To finish off the look I took the purple super colour and patted it in the center of the top and bottom lip and then getting my model to rub her lips together I created a messy lip which match the eyes.   


Tuesday, 22 March 2016

Gelatin Moulds

Creating Light scares using moulds...

In this blog I will be writing about the process of applying gelatin moulds to the skin. As we have been learning about 'continuity' during this unit this process can be very important to make-up artist. For example when an artist will want to repeat a look such as cuts if the gelatin moulds are made they can be re-used making them exactly the same in shape and form with only the skill of colouring left down to the artist. 


Kits:

- Gelatin Mould 
- Supercolour Pallet
- Fake blood
- Procaine
- Which Hazel
- Foundation
- Beauty Blender 
- Powder
- Fluffy brush
- Cotton buds
- Stipple sponge


Process:

To start off this process we were given pre-made scar moulds. The moulds are made by pouring hot, melted gelatin into a pre-made mould and when it is cool the gelatin would have set and would be ready for use. A tip when making the moulds are too place talcan powder in the mould first so it is easier to peel out the mould. 

To start using the mould I wanted to place mine on my wrist therefore by using a special protechics glue called 'Procaine', take a cotton bud and place this over the area where you would like to stick your scar and the apply some to the back of the scar. You have to wait till both your wrist and the mould have gone clear from the glue and then you can stick them together, otherwise the glue may show through which will not look realistic. 

When you have stuck your mould to your hand I then took a cotton bud and which hazel and rubbed this over the edges of my mould to thin out the mould. I needed to thin out the mould so when applying make-up to it, it would look more blended into my real skin. I did find this process very long winded but it is very nesseaurary to do so. 

When I thought my mould was blended enough I powdered over the whole mould to take away any shine. I then took a beauty blender and applied a foundation over the mould and blended it out into my real skin. 

To finish off the whole look I used the colours; yellow, dark and light red and a little blue to create the colourings within my scar. I used a stipple sponge to stipple on an even amount of fake blood to then finish off the look. 


Reflect: 

- When using the which hazel I would have taken more time in blending out the edges as I believe this would have improved on the realism of my scar.  
- I need to practice and study more into the colourings of scars as I believe I need to make it more realistic which I will achieve through practice.